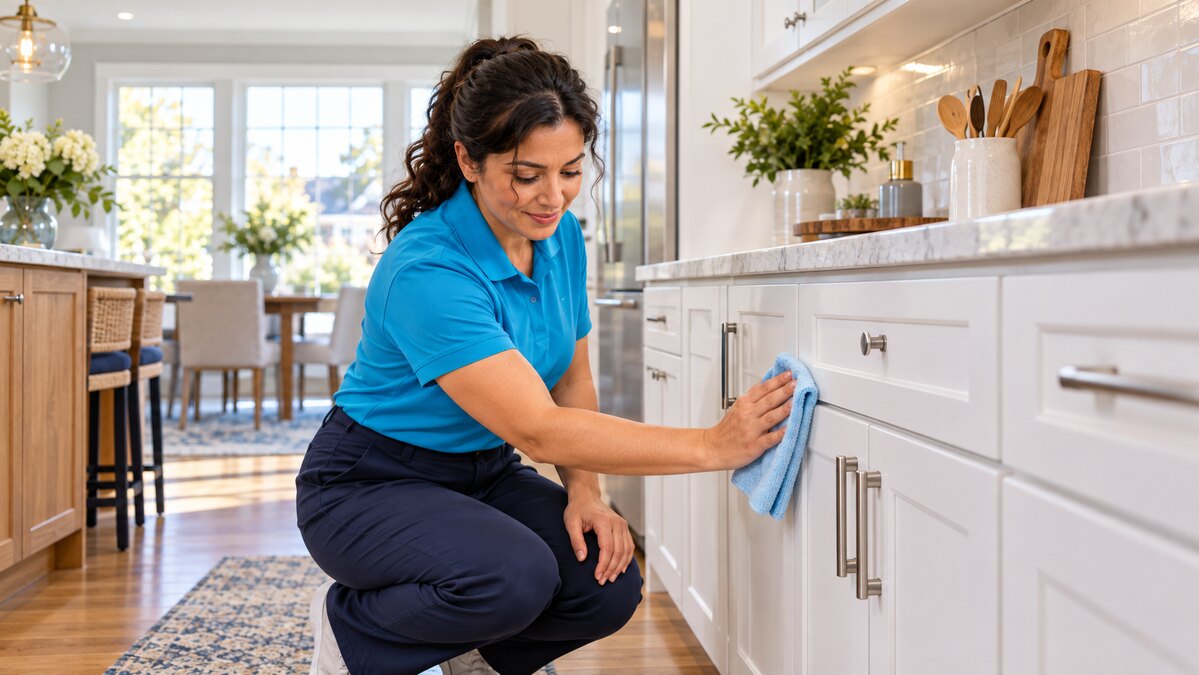
To clean kitchen cabinet fronts well, start with the finish, lift loose dust, and give greasy spots gentle attention before they spread across the door.
KITCHEN DETAILS · GREATER BOSTON & NORTH SHORE
Cabinet doors take a lot of contact during an ordinary week. Fingers reach for handles while cooking, splashes land near the sink, and a thin film can build up near the stove. In a Greater Boston kitchen, these marks may stand out even when the counters and floor look clean.
You can make the room feel more polished without soaking the doors or scrubbing away their finish. Use a method suited to the material, work in small sections, and keep water away from edges and seams.
What to check before you clean kitchen cabinet fronts
Look at the doors in good light. Are they painted wood, stained wood, laminate, thermofoil, or another material? Do you see peeling paint, loose veneer, swollen edges, or a damaged coating? A gentle method that works on one door may not be appropriate for another. If you have the cabinet maker’s care instructions, follow them first.
Start with clean, soft microfiber cloths and a product approved for your finish. Test a small hidden area before treating a visible door. Keep a separate dry cloth ready so moisture does not sit near joints, hardware, or the bottom edge. Avoid abrasive pads, excessive water, and strong products used without checking compatibility.
Work without spreading mess
Move countertop items that block the doors. Put a towel beneath a section if drips could reach wood, stone, or a delicate floor.
- Identify damaged finishes before wiping.
- Keep food and dishes away from the work area.
- Choose one small section to test first.
Start dry at the top
Use a dry microfiber cloth on the upper edge, door face, and nearby trim. Dust can turn into a streaky film if it is immediately mixed with cleaner.
- Work from upper cabinets downward.
- Check grooves and raised panel edges.
- Change a cloth once it becomes dirty.
Focus near handles and the stove
Fingerprints and cooking residue often gather around pulls, knobs, and doors closest to the range. Use a compatible cleaner lightly and give it only the contact time its label allows.
- Wipe around the hardware without flooding it.
- Use gentle passes rather than hard scrubbing.
- Stop if color or finish transfers to the cloth.
Finish one door before the next
Use a clean dry cloth to remove remaining moisture. Look from the side for streaks, and check edges where liquid can collect.
- Dry seams, corners, and hardware bases.
- Keep doors open briefly if a hinge area is damp.
- Leave damaged spots for repair assessment.
Match the method to the cabinet finish
Painted doors
Sound, washable paint may tolerate careful wiping, but a matte or aging finish can mark more easily. Test first and keep pressure light. Repeated rubbing at a stubborn spot can remove sheen or paint. If a scratch exposes the material underneath, it needs a finish repair rather than more cleaning.
Stained wood and veneer
Wood finishes vary. Follow the maker’s directions and avoid soaking joints or letting moisture stand against veneer edges. Use only a product suited to the finish. Swelling, lifting, or cloudy coating may point to existing damage that ordinary wiping cannot reverse.
Laminate and other manufactured surfaces
These surfaces can have different coatings, adhesives, and edge treatments. A gentle wipe may suit the main face but still damage an unsealed seam if liquid pools there. Check the manufacturer’s care instructions, test first, and dry promptly.
Where does kitchen buildup collect?
Check the door you touch while preparing food, the cabinet beside the stove, the panel below the sink, and the edge near the trash or recycling area. Cooking splatter can settle unevenly, so an upper cabinet above a prep space may need more attention than a rarely used door across the room.
Look at the handles from different angles. A quick pass over the middle of a door may miss grime around the pull or in a routed edge. Clean those details gently, then wipe the full front so the finish appears even. If grease remains despite a surface-safe method, pause rather than trying an aggressive product on a delicate finish.
A simple kitchen cabinet cleaning checklist
- Identify the cabinet material and note existing damage.
- Check the maker’s care instructions and test a hidden area.
- Clear the counters around the section you will clean.
- Dust the top edge, panel grooves, and door face.
- Wipe compatible fronts and handles using minimal moisture.
- Dry edges, seams, and hardware before moving to the next section.
Cabinet fronts are one part of a kitchen reset. Our standard versus deep cleaning guide helps you choose a broader service, while the services checklist helps you review tasks for a booked visit. Confirm extras and interior work before relying on either checklist as your appointment scope.
When is professional cleaning useful?
If many doors have buildup, a detailed kitchen visit may help address accessible fronts along with the agreed counters, sink, appliance exteriors, and floors. Explain the cabinet material, any damaged finish, and which areas are especially greasy when you request service. Some stains or worn coatings will remain even after careful cleaning.
A deep cleaning visit may be appropriate if the kitchen needs more attention than routine upkeep. For a maintained kitchen, recurring cleaning can support the agreed tasks at a predictable interval. Cabinet interiors, heavy degreasing, and finish repairs should be discussed separately rather than assumed.
Frequently asked questions
Can I use the same cleaner on every cabinet?
No. Cabinet materials and coatings vary. Check the manufacturer’s instructions, test a hidden area, and use a product suitable for that finish.
Why do my cabinet doors feel sticky near the stove?
Cooking residue can settle on nearby surfaces and collect dust. A compatible, gentle cleaning method may remove ordinary residue. If the surface still feels tacky, the finish itself could be affected and may need assessment.
Should I spray directly onto a cabinet door?
Follow the product label and cabinet maker’s instructions. Applying a suitable product to a cloth can help control moisture near seams and hardware.
Does a house cleaning include the inside of cabinets?
Not automatically. Cabinet interiors usually require the shelves to be emptied and the work to be confirmed in advance. Review your selected service and request the task specifically.
Give the details the right attention.
Moro Pro Cleaning is based in Melrose and serves homes across Greater Boston and nearby North Shore communities. Tell us about your kitchen, cabinet finish, and priorities so we can discuss the service that fits.
Prefer to talk? Call (781) 720-9118.


A Cleaner Home Starts Here
Professional cleaning based in Melrose and serving Greater Boston. Explore your options and book online when you're ready.